How to Change Cabinet Hinges and Fix Misaligned Cabinet Doors: The Ultimate DIY Guide
- admin
- November 12, 2026
- Blog
- how to replace cabinet hinges
- 0 Comments
We’ve all been there: you’re making your morning coffee, reach for a mug, and the cabinet door lets out a piercing groan—or worse, it hangs at a pathetic, crooked angle that makes your entire kitchen look like it’s leaning.
It’s one of those small household annoyances that eventually drives you crazy. The good news? You don’t need a five-figure kitchen remodel to fix it.
Learning how to replace cabinet hinges is a classic “weekend warrior” win. It’s cost-effective, incredibly satisfying, and—with this Handyman Home Doctor guide—surprisingly simple.
Whether you’re upgrading to the modern luxury of soft-close cabinet hinges or just fixing misaligned cabinet doors that haven’t shut right in years, here is everything you need to know to get the job done like a pro.
Why Cabinet Hinges Matter More Than You Think
Before we dive into the “how-to,” let’s talk about the “why.” Your kitchen cabinet hardware is the heavy lifter of your home. Think about how many times a day those doors are opened and closed.
Over time, the weight of the wood, combined with constant movement, leads to replacing worn cabinet hardware.
Old, friction-based hinges eventually lose their tension, leading to doors that sag or “bounce” open.
By replacing kitchen cabinet hinges, you aren’t just fixing a squeak; you’re protecting the structural integrity of your cabinet boxes and giving your kitchen a silent, premium feel.
The Pre-Game: Hinge Installation Tools & Prep
Before you start unscrewing things and leaving your kitchen in a state of disarray, make sure you have your toolkit ready.
Hunting for a specific drill bit while trying to balance a heavy oak door with your shoulder is a recipe for a bad afternoon.
The Essential Checklist:
- Screwdriver or Cordless Drill: While a drill is faster for removing cabinet door hinges safely, a manual screwdriver is actually better for the final hinge alignment adjustment to avoid stripping screws.
- Replacement Hinges: This is the most critical part. Are you using overlay cabinet hinges, concealed cabinet hinges, or inset hinges? (More on this below).
- Measuring Tape: Crucial for measuring cabinet hinge placement if you are moving the hinge location.
- The “Toothpick Trick”: Have some wood filler, wood glue, and toothpicks on hand for those pesky stripped cabinet door mounting holes.
- Painter’s Tape: Useful for marking heights without marking up your beautiful cabinetry finish.
Step 1: Identifying Your Hinge Type
You cannot buy just any hinge and expect it to work. When replacing kitchen cabinet hinges, you need to match the “overlay” of your door.
- Concealed (European) Hinges: These are the most common in modern homes. They are hidden inside the door and sit in a large “cup” hole.
- Overlay Hinges: These are used when the door sits on top of the cabinet frame. You’ll need to know the overlay distance (usually 1/2 inch or 1 1/4 inch).
- Inset Hinges: These are for doors that sit flush inside the cabinet frame.
If you are installing soft-close hinges, check the “cup” size. Most standard concealed hinges use a 35mm diameter hole.
If your old hinges were a different style, you may need to look into drilling holes for cabinet hinges using a Forstner bit and a jig.
Step 2: Removing Old Cabinet Hinges Safely
It sounds simple, but there is a technique to how to remove old cabinet hinges without damaging the wood or your toes.
- Work from the bottom up: Start by loosening the screws on the bottom hinge first. If you remove the top one first, the door’s weight will pull down, potentially snapping the wood around the bottom hinge or stripping the holes.
- The Second Pair of Hands: If you have large pantry doors, don’t be a hero. Have a partner hold the door steady while you back the screws out.
- Organize Your Parts: Even if you think you’re throwing them away, keep the old cabinet hinge screws until the job is done. Sometimes the new screws are either too long or too short for your cabinet’s thickness, and you’ll need the old ones as a backup.
Step 3: Prepping the “Blown Out” Holes
Often, the reason you’re fixing loose cabinet hinges is that the wood itself has stripped out. The screws just spin and spin without gripping.
The Handyman Pro Tip: Don’t just jam a bigger screw in there; you’ll split the cabinet frame. Instead, take a toothpick or a small wooden matchstick, dip it in wood glue, and shove it into the hole.
Snap it off flush with the surface. Once it dries (about 20 minutes), you have a fresh “plug” of wood for your new cabinet hinge screws to bite into. This is the secret to securing cabinet hinges tightly for the long haul.
Step 4: Installing New Cabinet Hinges
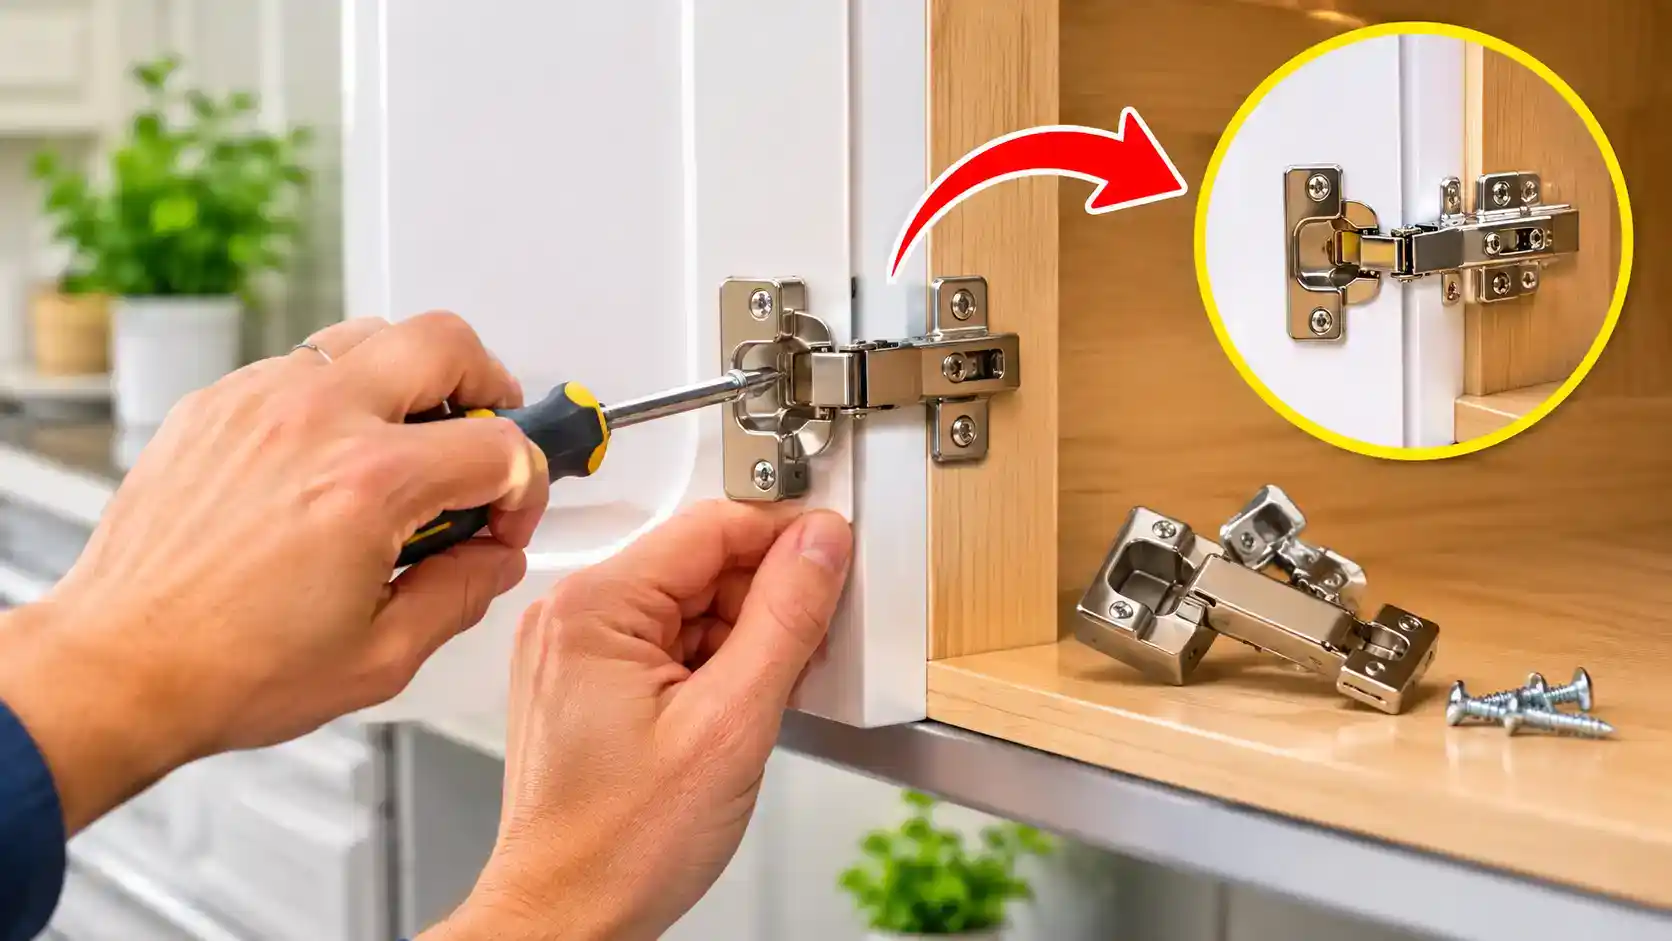
Now for the fun part: installing new cabinet hinges.
- Attach to the Door First: Lay the door flat on a towel or carpeted surface to avoid scratching the finish. Drop the hinge into the hole (for concealed hinges) or align it with your marks.
- Check for Square: Use a small combination square or a straight edge to make sure the hinges are perfectly perpendicular to the door edge. If they are even slightly crooked, the door won’t close properly.
- Pilot Holes are Your Friend: Even if you aren’t drilling holes for cabinet hinges from scratch, it’s a good idea to use a small bit to create a guide hole. This ensures the screw goes in perfectly straight.
- Mounting to the Frame: Bring the door to the cabinet. If you’re working alone, you can rest the door on a stack of books to get the height right. Screw the cabinet hinge plates into the cabinet frame.
Step 5: The Art of Aligning Cabinet Doors
This is where most DIYers get frustrated. You’ve finished installing soft-close hinges, but the doors are crooked, there’s a massive gap in the middle, or the top of the door is rubbing against the frame. Don’t panic!
Fixing misaligned cabinet doors is all about understanding the three adjustment screws found on most modern hinges:
- The Side-to-Side Screw: Usually, the screw is closest to the door. Turning this moves the door left or right. Use this to fix the “gap” between a pair of double doors.
- The Depth Screw: Usually, the screw is furthest back. This moves the door “in and out.” If the top of your door isn’t sitting flush against the cabinet, this is the one to turn.
- The Height Screw: Often located on the mounting plate itself. This allows you to shift the door up or down so the horizontal lines of your kitchen stay perfect.
Cabinet hinge adjustment tips: Make small turns—a quarter turn makes a bigger difference than you think. Close the door after every adjustment to check your progress.
Maintaining Your Kitchen Cabinet Hardware
Once you’ve mastered how to change cabinet hinges, you want them to stay in top shape.
- Avoid Overloading: Heavy organizers hanging on the back of cabinet doors are the number one cause of sagging hinges.
- Check the Screws: Every six months, do a quick “snug check.” If you notice a door starting to drift, a quick turn of a screwdriver can prevent the hole from stripping out entirely.
- Clean the Mechanisms: Dust and grease from cooking can gum up soft-close cabinet hinges. A quick wipe with a damp cloth (no harsh chemicals!) keeps the hydraulic dampers working smoothly.
When to Call the Professionals
While this cabinet door hinge replacement guide covers most standard home setups, some situations require a “doctor.”
If your cabinets are made of high-density fiberboard (MDF) that has crumbled, or if you are looking to switch from traditional hinges to a completely different style that requires professional-grade routing, it might be time to call in the experts.
At Handyman Home Doctor, we specialize in the details that make a home feel whole again. Whether it’s a full DIY cabinet hinge repair gone wrong or a total hardware refresh, we have the tools and the experience to ensure your kitchen looks—and functions—perfectly.
Related Posts